SushiBot - Part 1
2022-02-08
As always, follow this link to see the GitHub repository.
Preamble
When my wife and I lived in Taiwan, eating out triumphed over homemade meals. The price of food there was insanely cheap, with each dinner being $2 to $3 CAD. So, like most Taiwanese, when dinner rolled around, we would head out and find somewhere to eat.

Back in Canada, we continued my wife's family tradition of holding a Japanese New Year's dinner. For us, it meant two days of cooking before having people over to enjoy the meal. Late last year, she had the idea for some sort of sushi delivery system of our own. At first, a model train was the most likely candidate, but then what would we do with the train and its tracks the rest of the year? Eventually, we came to the obvious conclusion: we'll build a robot instead.
Design & Acquisition
I didn't know much about the integration between software and hardware. I had done some work with a Raspberry Pi at school, but this project was a step above. Breaking it down to the basic components, we knew we needed a brain for the robot, a body, and some way of keeping it on track. Despite all the tutorials out there for line-following robots, none of them were quite right. The biggest issue was often with the components they required, many of which were no longer in production. In the end, I did my own research and came up with the following parts list:
- Raspberry Pi (the brain)
- A motor controller
- A bunch of jumper cables
- Vehicle chassis
- Wheels
- DC motors x4
- Line sensors (IR) x2
- Power supply
In Nanaimo, I located a business called BC Robotics. Not only did they carry a chassis that came with four motors, wheels, and a power supply, but they stocked the Adafruit Motor Controller. It was truly meant to be. This motor controller could operate all four motors independently, and it came with its own basic package for controlling them through Python. We ordered the batch for pickup and made a day trip to Nanaimo to pick everything up.
Construction & Testing
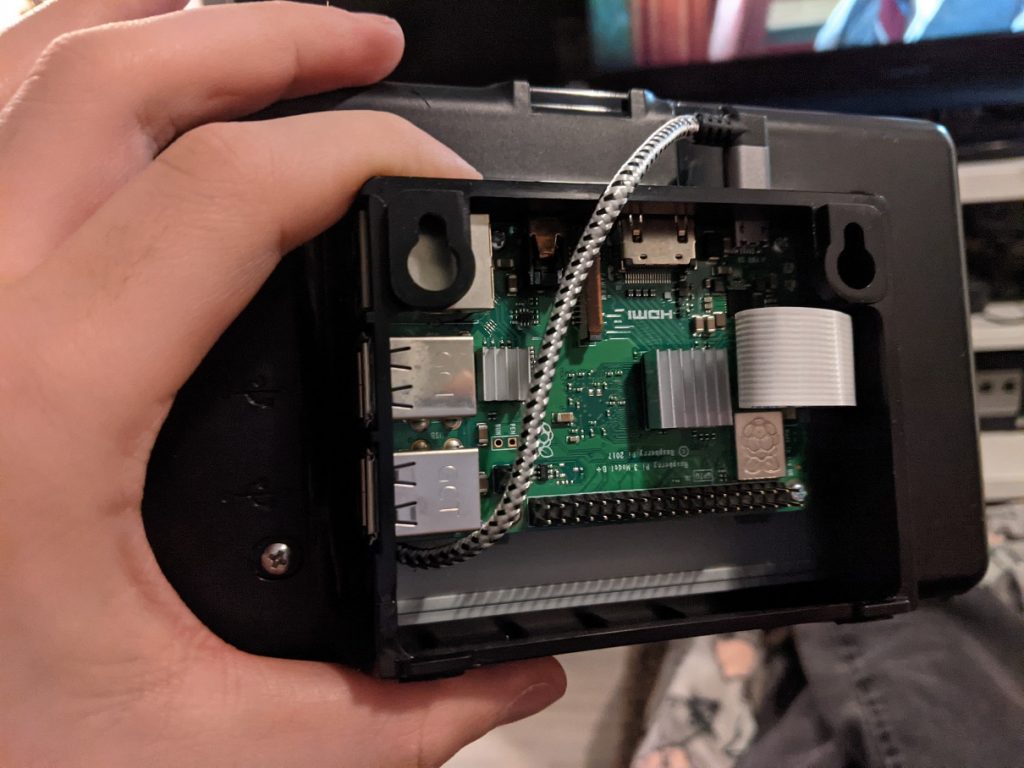
Somewhat to my surprise, the headers were not soldered onto the motor controller. I had never done any electronics soldering, although I did own a soldering kit. There was another issue: the header had very short pins, so there was no way to attach the sensors if I wanted to stack it directly on the Pi. I decided to just solder the pins it needed for now, with the plan to attach a long-pinned header later. With a tip that was definitely a little too big, I soldered everything together.
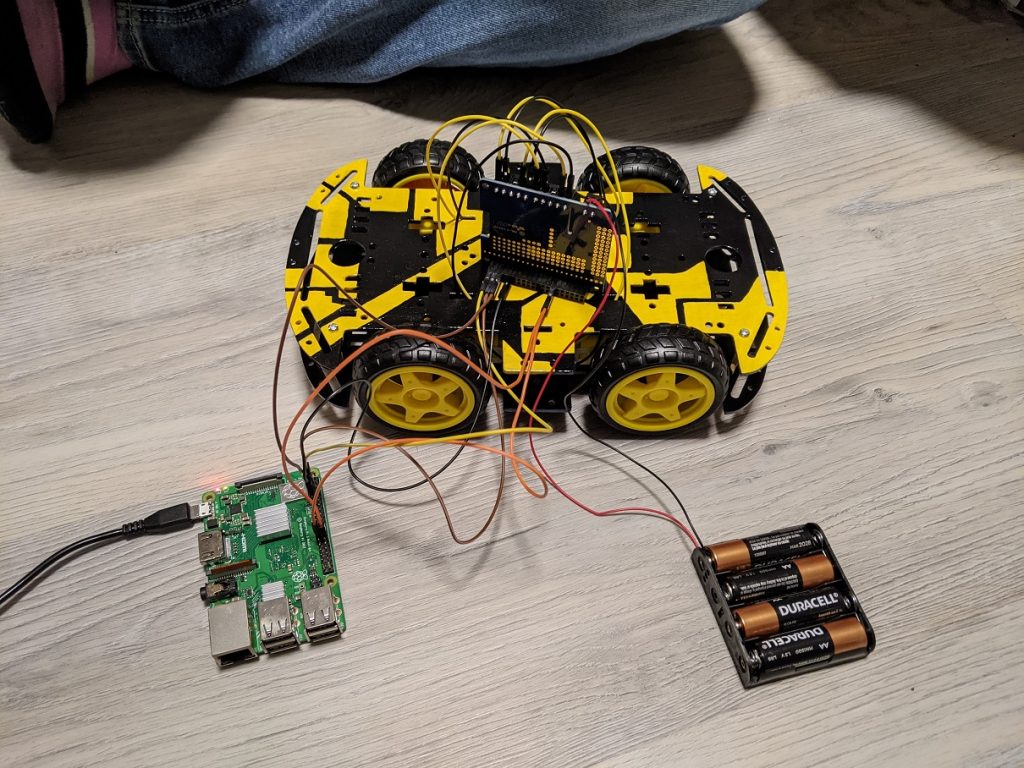
To practice some driving, I wrote a Manual class which outlined all the basic movements: forward, back, right, left, stop, and coast. Most of these required parameters for time and speed, but they allowed me to call them directly from the Python shell and test drive our robot. After that I strung some together in another script for further testing. The results were pretty good. In this video, I was using the stop() functions between each command, so it was a little jerky. I swapped those out for a coast() function that let the wheels move freely between commands, and it smoothed things out tremendously.
Unfortunately, this is where part 1 ends. There was a bit of a setback that I'll post about next time, hopefully with some good news as well.